> ## Documentation Index
> Fetch the complete documentation index at: https://docs.humiris.ai/llms.txt
> Use this file to discover all available pages before exploring further.
# Getting Started with Humiris AI in Cursor
> Learn how to add Humiris models in cursor
### **Getting Started with Humiris AI in Cursor**
#### **STEP 1: Installing Cursor**
1. Download and install Cursor from[https://www.cursor.com/downloads](https://www.cursor.com/downloads)
2. Open the **Cursor app**.
#### **STEP 2: Adding Humiris AI Models**
1. In the **top-left corner**, click the **“Cursor” tab** in the menu bar. In the dropdown, click **“Settings”**, then choose **“Cursor Settings.”**
2. Once you're in Cursor Settings, go to the **“Models”** tab.
3. In the **Models** tab, first **unselect all currently selected models.**
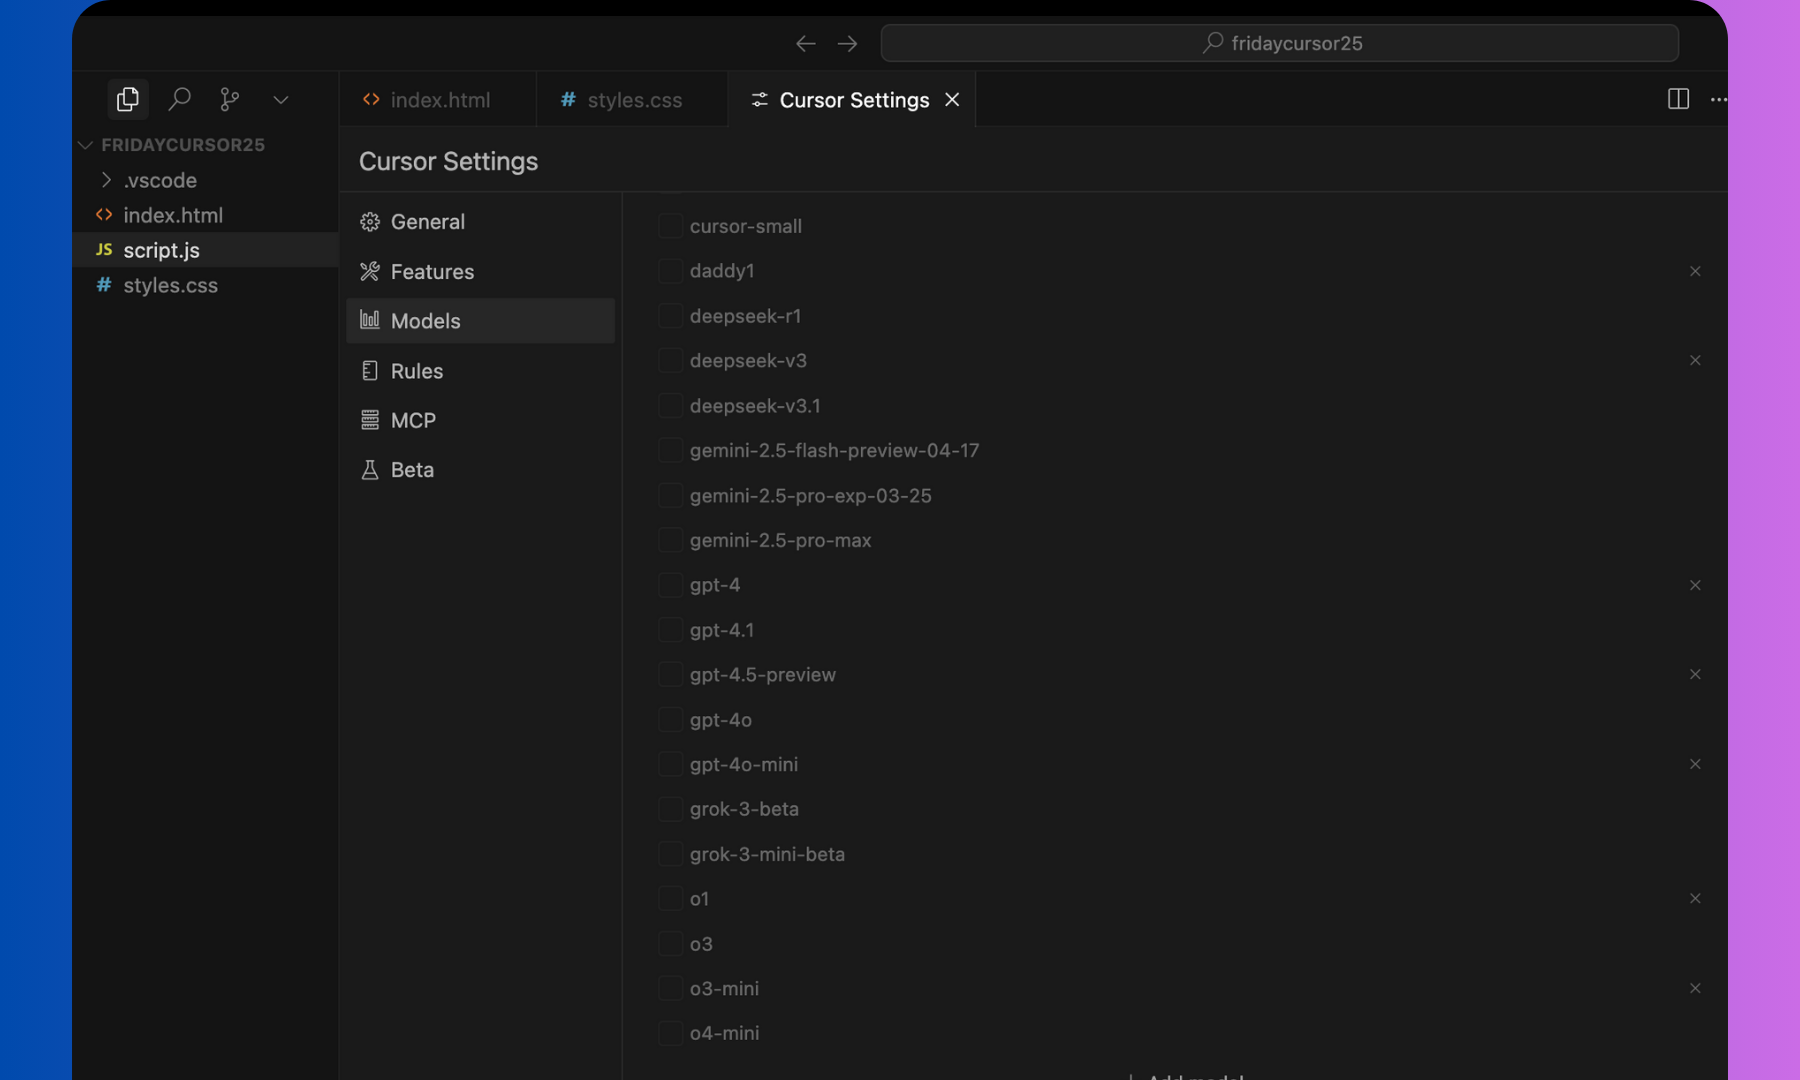 4. Then, click the **➕ (plus)** button to **add the Humiris models**. You can add **one**, **some**, or **all** of the following by typing their name:
* **baby1** – a small, fast, general-purpose model
* **baby1-adv** – an advanced version of baby1 with improved reasoning
* **mommy1** – larger, more capable, and creative than baby1
* **mommy1-adv** – an advanced version of mommy1 with stronger problem-solving
* **daddy1** – the most capable model, ideal for complex tasks
* **daddy1-adv** – an advanced version of daddy1, offering the highest performance
* **codiris-v1-preview** - our first multimodal, post-trained engineered specifically for complex code workflows.
* \*\*codiris-v1-mini - \*\*Cost-efficient, post-trained built for coding
4. Then, click the **➕ (plus)** button to **add the Humiris models**. You can add **one**, **some**, or **all** of the following by typing their name:
* **baby1** – a small, fast, general-purpose model
* **baby1-adv** – an advanced version of baby1 with improved reasoning
* **mommy1** – larger, more capable, and creative than baby1
* **mommy1-adv** – an advanced version of mommy1 with stronger problem-solving
* **daddy1** – the most capable model, ideal for complex tasks
* **daddy1-adv** – an advanced version of daddy1, offering the highest performance
* **codiris-v1-preview** - our first multimodal, post-trained engineered specifically for complex code workflows.
* \*\*codiris-v1-mini - \*\*Cost-efficient, post-trained built for coding
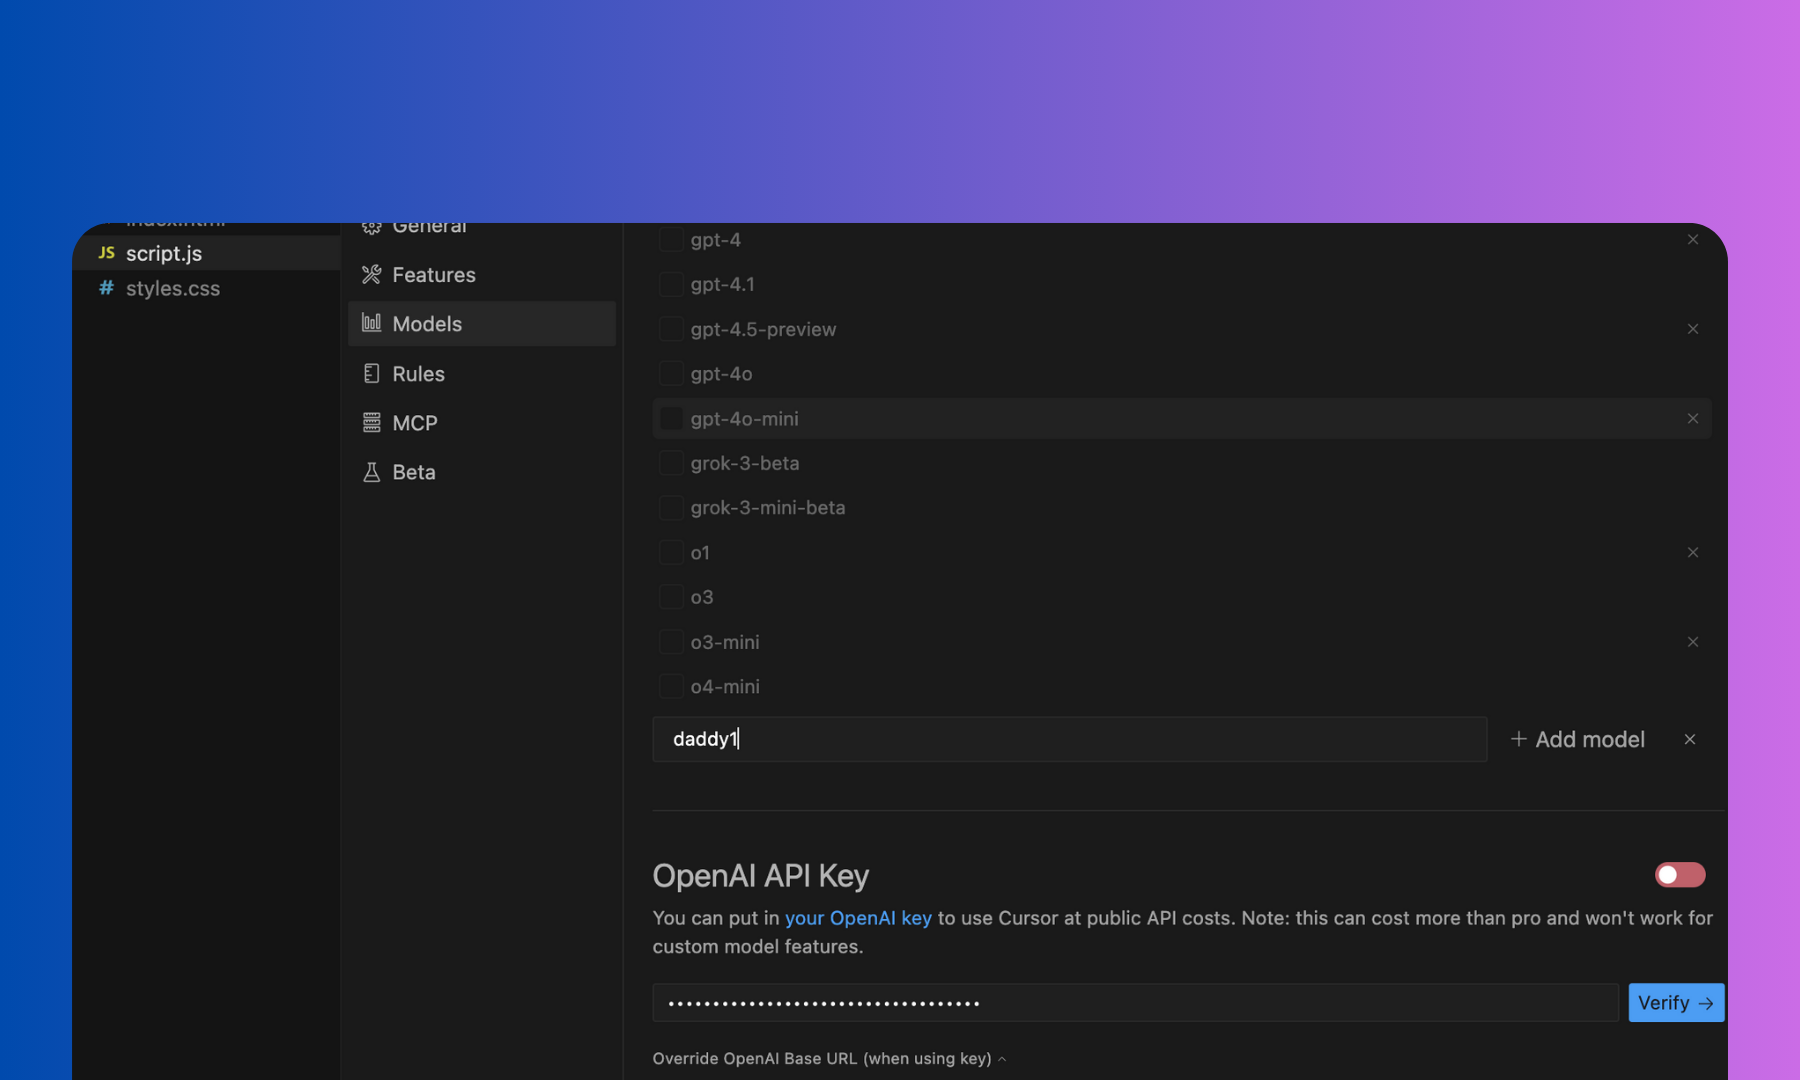 5. In the **API Keys** section of the Models tab:
* Turn OFF the following providers: Anthropic, Google, Azure, and AWS
* **Only OpenAI should be toggled ON (green).**
#### **STEP 3: Create a Humiris Account and Get Your API Key**
1. Go to[ ](https://humiris.ai)[humiris.ai](http://humiris.ai) and **create an account**.
1. When you add your credit card, we’ll automatically give you **\$5 in free credits** to get started.
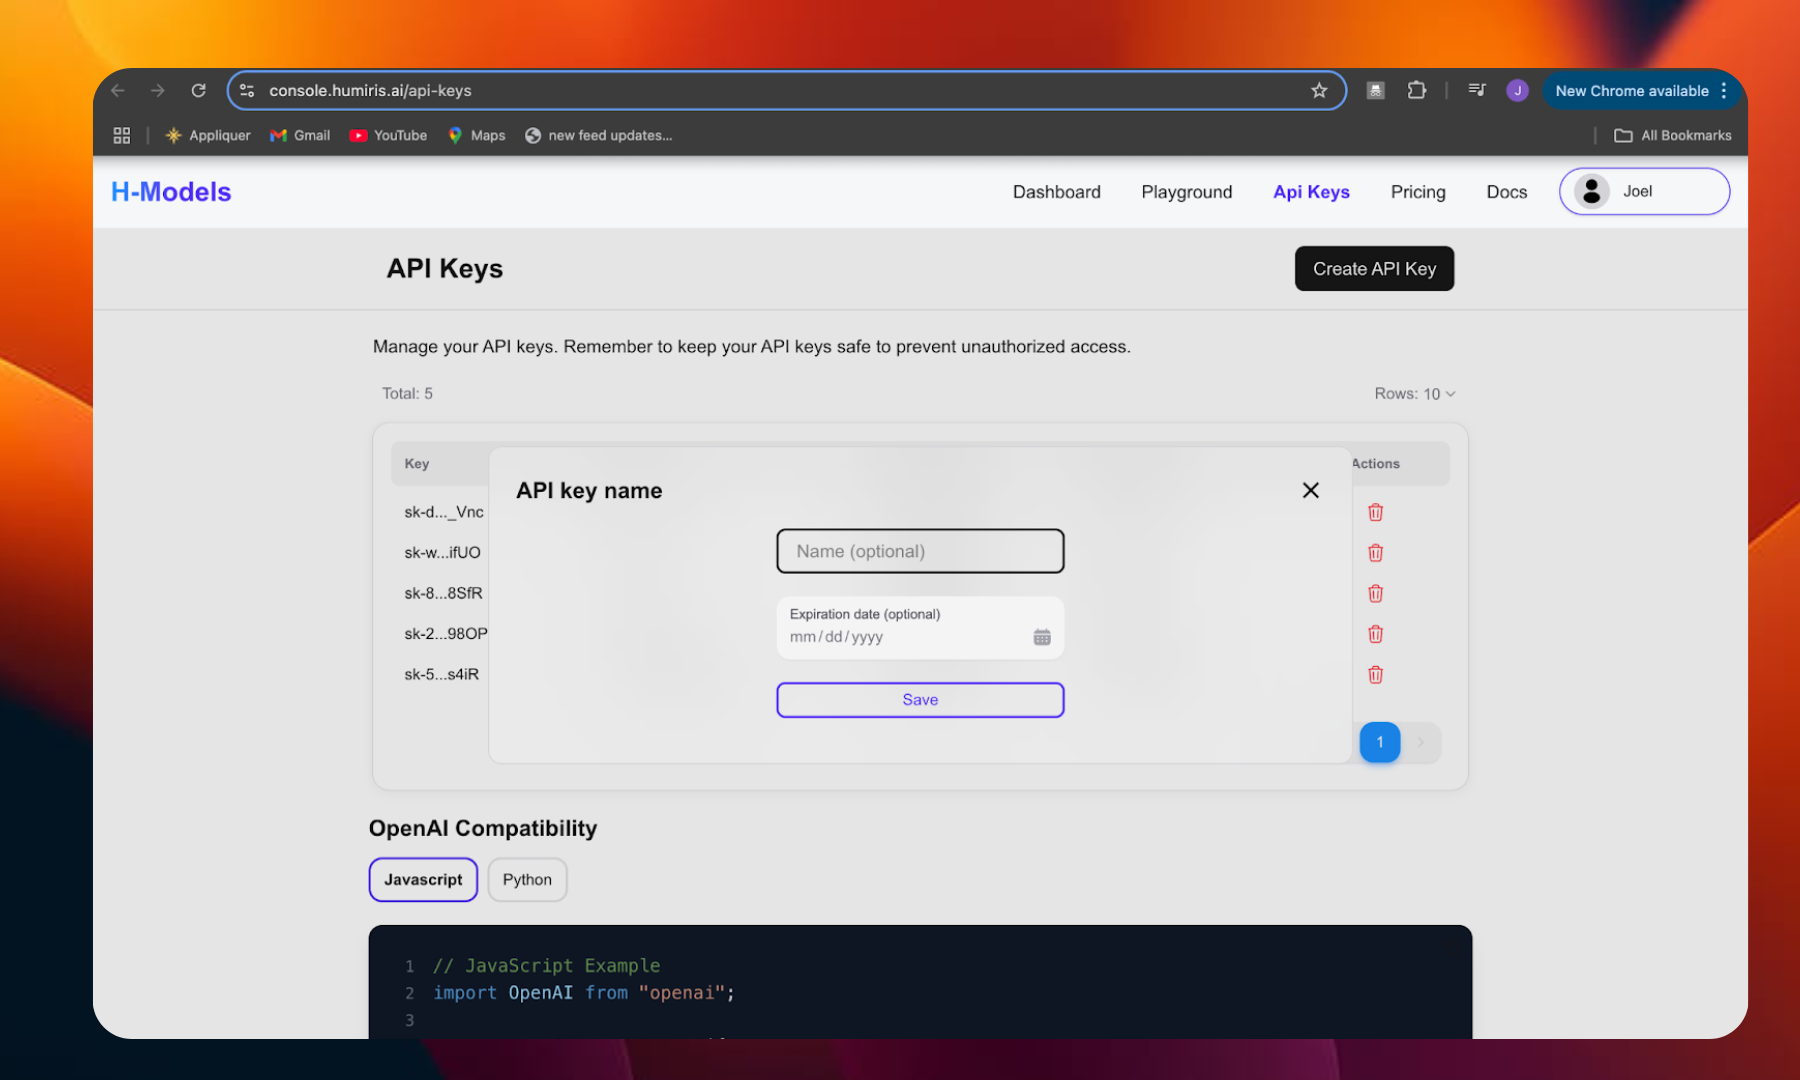
2. Once logged in, go to **API Keys** and click on \*\*“Create API Key” \*\*to generate a new API key.
3. **Copy the API key**.
5. In the **API Keys** section of the Models tab:
* Turn OFF the following providers: Anthropic, Google, Azure, and AWS
* **Only OpenAI should be toggled ON (green).**
#### **STEP 3: Create a Humiris Account and Get Your API Key**
1. Go to[ ](https://humiris.ai)[humiris.ai](http://humiris.ai) and **create an account**.
1. When you add your credit card, we’ll automatically give you **\$5 in free credits** to get started.
2. Once logged in, go to **API Keys** and click on \*\*“Create API Key” \*\*to generate a new API key.
3. **Copy the API key**.
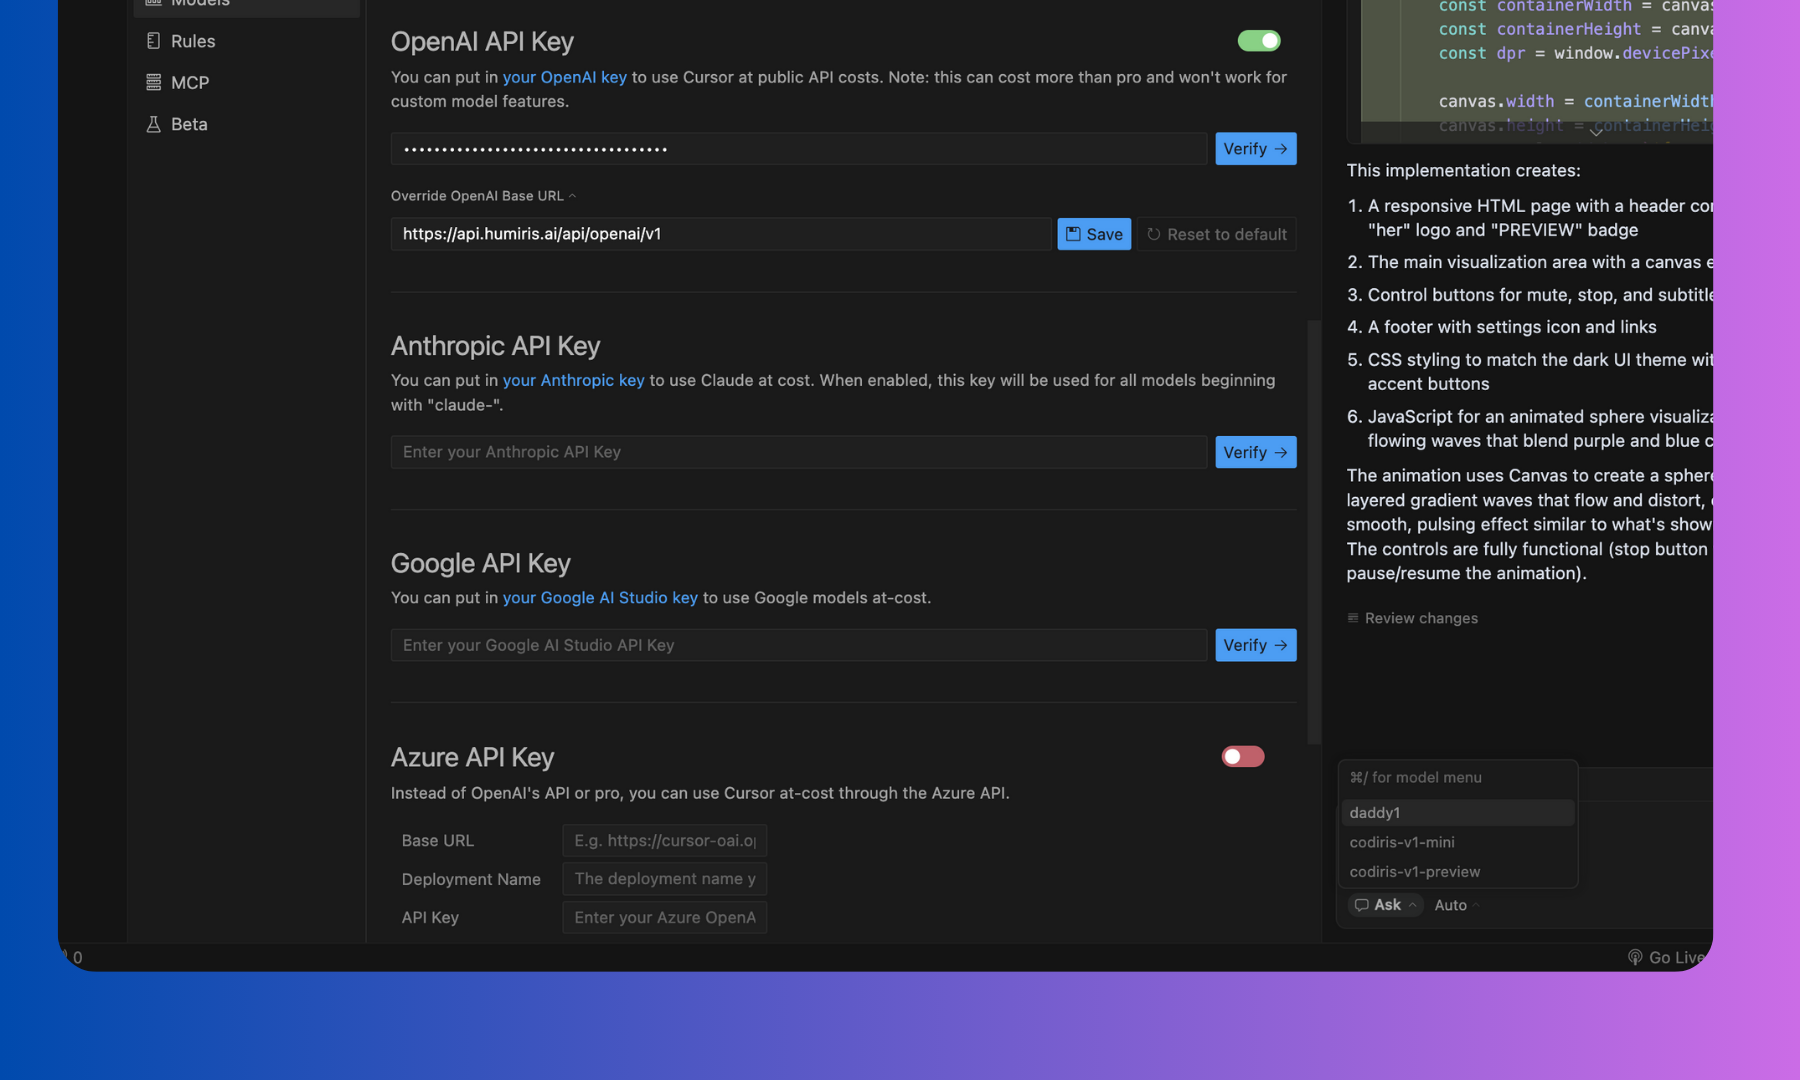
 #### **STEP 4: Complete Setup in Cursor**
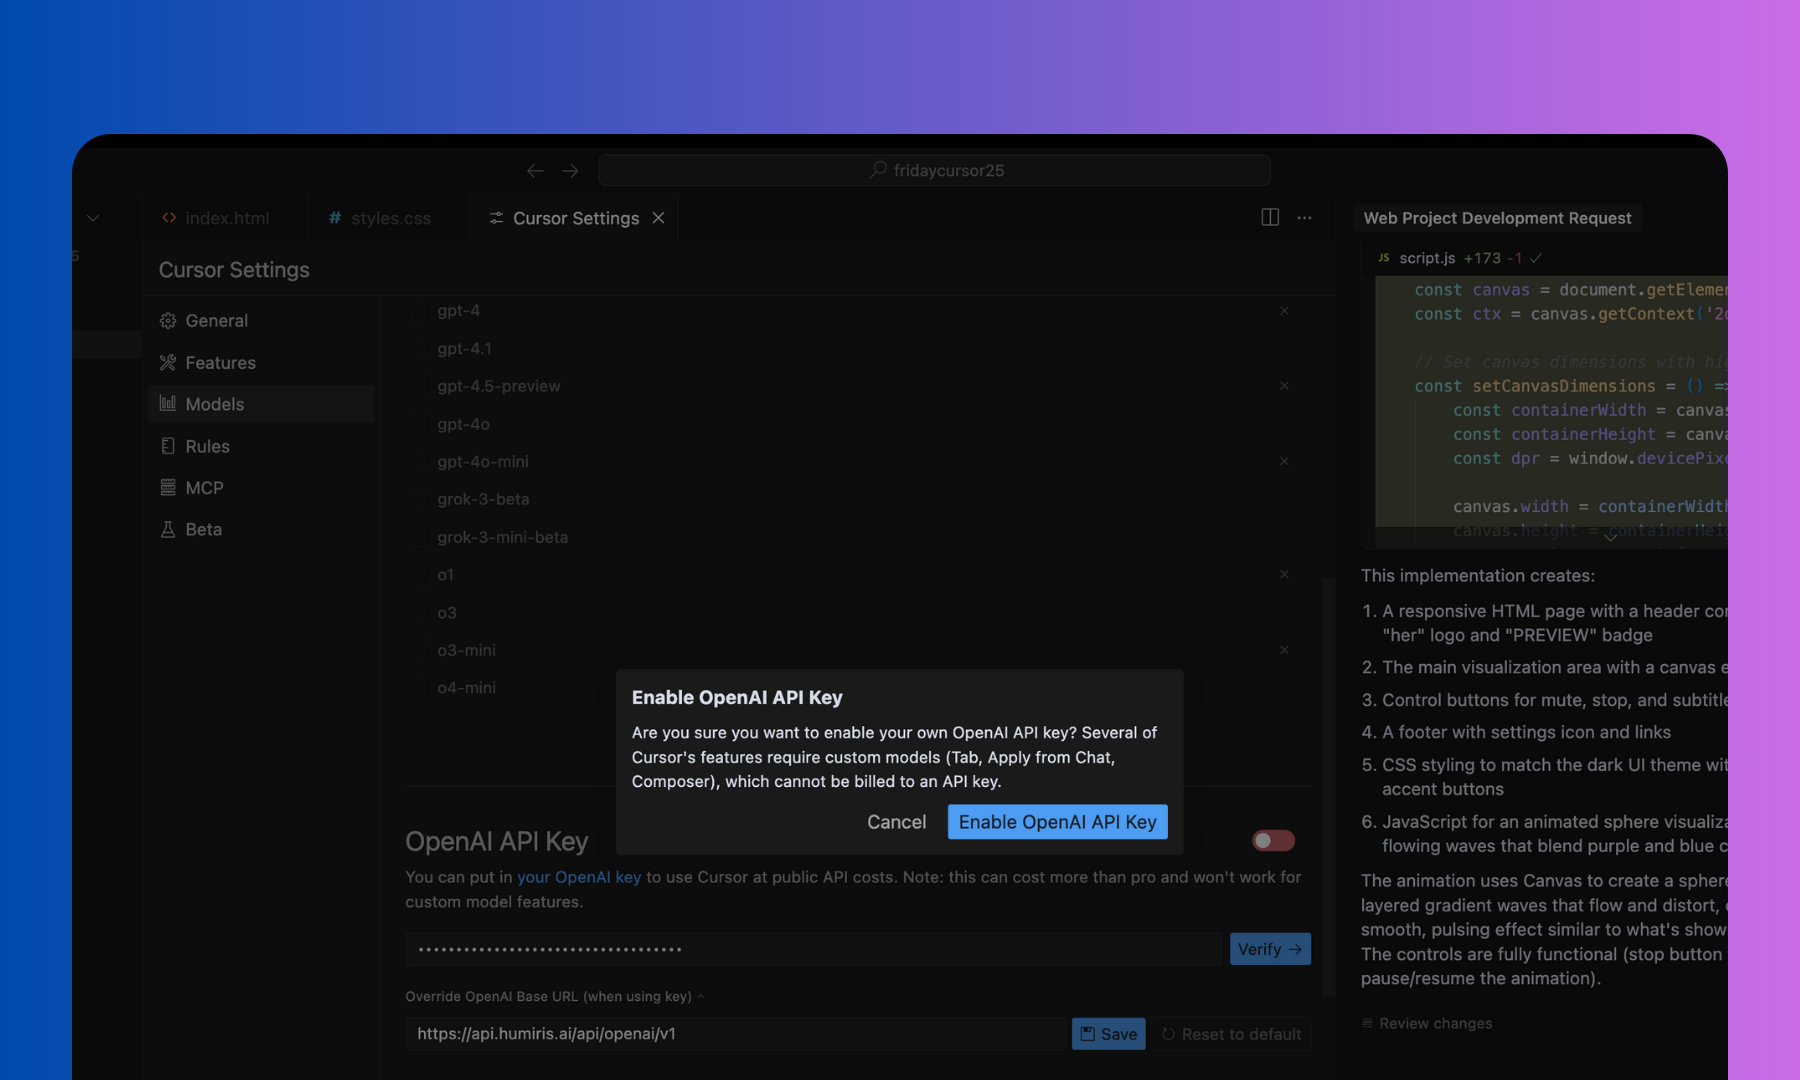
1. Back in Cursor, paste your **Humiris API key** in the **OpenAI API Key** field.\
*(Don’t click “Verify” yet — there’s one more step.)*
2. Scroll down to the field labeled **“Override OpenAI Base URL”** and enter [https://api.humiris.ai/api/openai/v1](https://api.humiris.ai/api/openai/v1)
3. Click **Save**.
4. Now click **Verify** to finish setup.
#### **STEP 4: Complete Setup in Cursor**
1. Back in Cursor, paste your **Humiris API key** in the **OpenAI API Key** field.\
*(Don’t click “Verify” yet — there’s one more step.)*
2. Scroll down to the field labeled **“Override OpenAI Base URL”** and enter [https://api.humiris.ai/api/openai/v1](https://api.humiris.ai/api/openai/v1)
3. Click **Save**.
4. Now click **Verify** to finish setup.
 \
**STEP 5: Use Humiris Models in Cursor**
**Cursor support only now the ask mode of humiris models.**
[**If you have some questions send message to contact@humiris.ai**](mailto:contact@humiris.ai)
\
**STEP 5: Use Humiris Models in Cursor**
**Cursor support only now the ask mode of humiris models.**
[**If you have some questions send message to contact@humiris.ai**](mailto:contact@humiris.ai)